
FLARE-VM Installation in Windows 11 — Easy and promising!
Malware Analysis on Windows 11 via Hyper-V

Disclaimer : Do try this in your Lappy or PC, gonna be fun :)
So installing Flare-VM always comes with few bottlenecks, so I decided to help the community by creating a walk through guide if you’re facing any issues while installing Flare-VM for MALWARE ANALYSIS.
Lot of people might have explained or guided you on how to install Flare-VM in Win 10, but for a change let’s do in Windows 11.

These are my specificiations during installation:
Host OS — Win 11 pro , Virutalisation Tool- HyperVisor
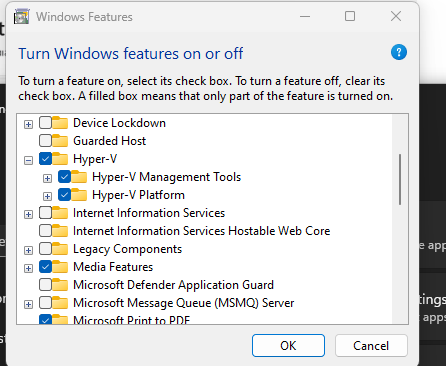
So we need to make sure that Hyper-V is supported for your OS. Navigate to Settings and search Windows Features. Then look for hyper-v, if not enabled, do it nowwww. (Sample pic below)
Once enabled, open Hyper-V and you should be seeing a console with your System Name (Blacked out in the below pic).
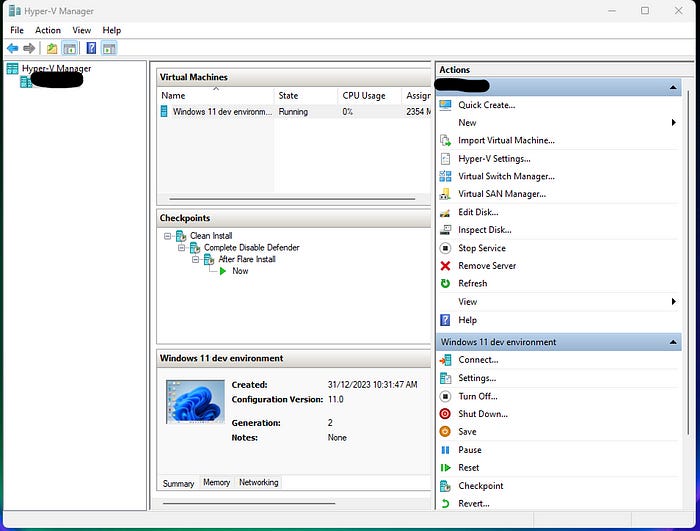
Step 1 : Installing Windows 11 Dev environment
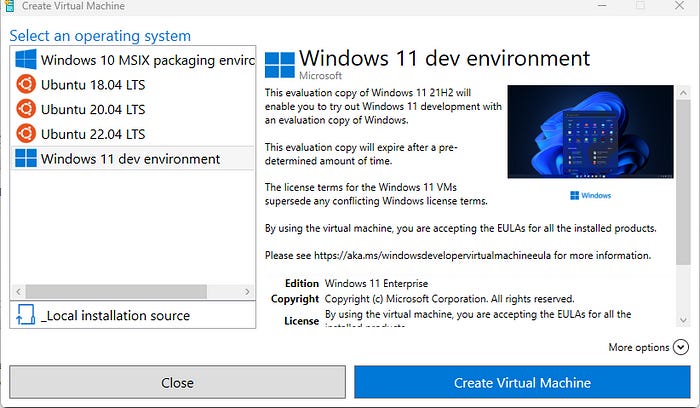
To the right in the above picture, you can see a option named “Quick Create..”. Click on it and you should be presented with a list of OS that you are interested to install. Select “Windows 11 dev environment” and hit “Create Virtual Machine” button.
Coffee Time as the size of the installation will be around 20GB. Sit back and relax.
Once Installed, just do the basic setup of your profile and now you’re ready to go.
In hyper-V we can get a checkpoint (same as snapshot) once install is done and everything is up and running. Right Click on VM and click on “checkpoint” option. Having checkpoint can be handy if our vm goes to unstable state during malware analysis.
Step 2 : Turning off Defender.
I’ll drop a video link below and follow the instructions to turn off Defender.
Skip to the part of Disabling Defender in the video and follow the steps, you should now have your OS without defender. (Don’t worry, this video is not for MAC users, it is indeed for everyone who decides to turn off defender in Win 11)
After completion, open VM and Run this script using a tool called “AdvancedRun”.
Both script and tool links are shared below.
Link for tool : https://www.nirsoft.net/utils/advanced_run.html
Link to script : https://github.com/jeremybeaume/tools/blob/master/disable-defender.ps1
Open the downloaded tool in VM, and then do the following:
Drag and drop it onto application and it will automaticlly take the path of the file.
Select the “Run Mode” to : Powershell Script
Set “Priority” : High
Set the “Powershell Script File” to : <script_name.ps1>
Set “Run As” to : Trusted Installer
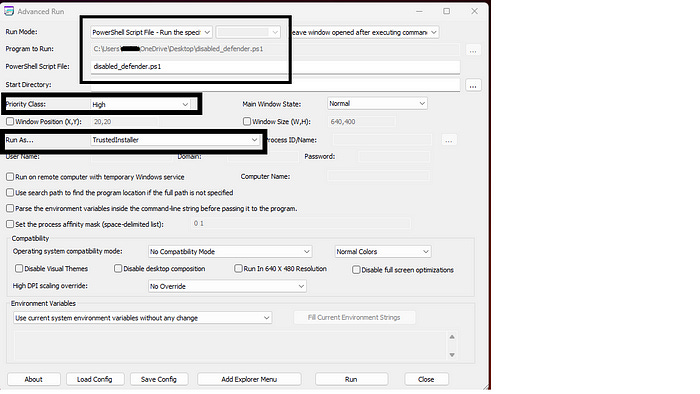
You might have to restart the VM once or twice. After execution, you will be able to see that defender features are turned off in the terminal.
Take a snapshot at this point (optional).
Step 3 : Now you have to install Flare-VM.
Key Note : Good things take time , :).
Flare-Vm github link : https://github.com/mandiant/flare-vm
Go to flare-vm github repo (inside the VM), and download the zip file. Unzip and follow the below steps :
Open powershell (as Adminstrator) and change your directory path to your flare-vm folder and run the below powershell commands.
Command 1 : Unblock-File .\install.ps1
Command 2 : Set-ExecutionPolicy Unrestricted
Command 3: .\install.ps1 -password <password> -noWait -noGui
After this, you will be prompted with few simple questions, you just have to type “Y” . If any prompt opens, click on ok or submit button.
Now sit back and relax, flare-vm will get installed and it might take upto 45–60 mins for the installation. Few packages might not be installed, don’t worry, you can install it manually. Your laptop might restart several times depending during the installation.
Step 4: All you need to do is take a snapshot after the install.
Your display will not change to Flare-VM logo as in Windows 11, flare-vm repo just installs all the required tools. In Windows 10, your display might change to the logo of flare-vm, but the display wallpaper doesn’t change in Windows 11.